
Essential Steps for Cleaning and Prepping Walls Before Your Next Interior Painting Project
- Feb 22
- 3 min read
Painting a room can dramatically change its look and feel, but the key to a professional finish lies in how well you prepare the walls. Skipping or rushing through wall cleaning before painting and surface preparation often leads to peeling paint, uneven texture, and a finish that doesn’t last. Whether you are a homeowner, a DIY renovator, or a renter looking to refresh your space, taking the time to prep walls for paint will save you time, money, and frustration.
This guide walks you through the essential steps for cleaning, sanding, and patching your walls to ensure your interior painting preparation sets you up for success.
Why Proper Wall Preparation Matters
Before diving into the how-to, it’s important to understand why cleaning and prepping walls is crucial. Paint adheres best to clean, smooth surfaces. Dirt, grease, and old paint flakes create barriers that prevent paint from bonding properly. Uneven surfaces or holes cause paint to look rough and can lead to premature chipping.
Proper preparation:
Extends the life of your paint job
Creates a smooth, professional finish
Saves money by reducing the need for touch-ups
Helps paint colors appear true and vibrant
Taking the time to clean and prep walls is the foundation of any successful interior painting project.
Step 1: Cleaning Walls Effectively
Cleaning walls before painting removes dust, dirt, grease, and stains that interfere with paint adhesion. Here’s how to clean walls thoroughly:
What You’ll Need
Mild detergent or trisodium phosphate (TSP) cleaner
Warm water
Sponge or soft cloth
Bucket
Rubber gloves
Ladder (if needed)
Cleaning Process
Remove dust and cobwebs using a dry cloth or vacuum with a brush attachment.
Mix cleaning solution: For general cleaning, mix a few drops of mild detergent in warm water. For tougher grease or stains, use a TSP cleaner following package instructions.
Test a small area first to ensure the cleaner doesn’t damage the wall surface.
Wipe walls from bottom to top with a sponge dipped in the cleaning solution. This prevents streaks.
Rinse with clean water and a fresh sponge to remove soap residue.
Allow walls to dry completely before moving on to sanding or patching.
Cleaning walls before painting is especially important in kitchens, bathrooms, and high-traffic areas where grease and grime build up.
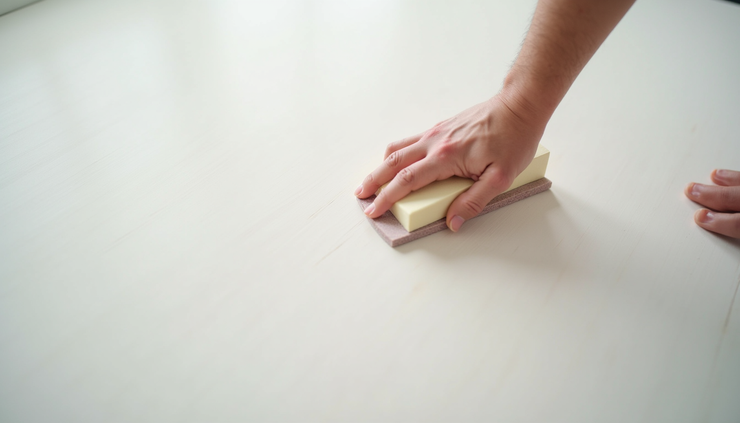
Step 2: Sanding Walls for a Smooth Surface
Sanding walls smooths out rough patches, removes loose paint, and creates a slightly rough texture that helps new paint stick better. Proper sanding is a key part of interior painting preparation.
Tools and Materials
Fine to medium grit sandpaper (120- to 150-grit)
Sanding block or pole sander
Dust mask
Vacuum or tack cloth
Sanding Tips
Focus on problem areas such as peeling paint, rough patches, or glossy surfaces.
Sand gently and evenly to avoid gouging the wall. Use circular or back-and-forth motions.
Wear a dust mask to avoid inhaling dust.
Clean up dust thoroughly with a vacuum or tack cloth after sanding. Dust left on walls can prevent paint from adhering properly.
For drywall, sanding helps feather edges of patched areas so they blend seamlessly with the rest of the wall.
Step 3: Patching Holes and Imperfections
Walls often have nail holes, dents, cracks, or other imperfections that need fixing before painting. Patching these areas ensures a flawless finish.
Materials Needed
Spackling compound or wall filler
Putty knife
Sandpaper (fine grit)
Primer (optional)
How to Patch Walls
Clean the area around holes or cracks to remove dust.
Apply spackling compound with a putty knife, pressing it firmly into holes or cracks.
Smooth the surface with the putty knife, removing excess filler.
Allow the patch to dry completely according to product instructions.
Sand the patched area lightly until smooth and flush with the wall.
Prime the patch if needed, especially if the filler is porous or if you are painting a light color over a dark patch.
For larger cracks or damaged drywall, consider using a patch kit or replacing the damaged section before painting.
Additional Tips for Interior Painting Preparation
Remove or cover switch plates and outlet covers to avoid paint splatters.
Use painter’s tape to protect trim, windows, and ceilings.
Inspect walls under good lighting to spot imperfections you might miss otherwise.
Avoid painting over wallpaper unless it is firmly attached and in good condition. Otherwise, remove wallpaper first.
Ventilate the room well during cleaning, sanding, and painting for safety and comfort.
Final Thoughts on Preparing Walls for Paint
Taking the time to clean, sand, and patch your walls before painting makes a noticeable difference in the final look and durability of your paint job. Proper interior painting preparation helps paint adhere better, creates a smooth surface, and prevents future problems like peeling or cracking.
Next time you plan to refresh your walls, start with these essential steps. Your effort will pay off with a beautiful, long-lasting finish that transforms your space.

Comments